Lighting Up Your Home
Daina Williams • June 9, 2025
How to Choose the Perfect Fixture for Every Space

As your local Topeka handyman, we've seen it all – from dim rooms that feel like caves cavern to spaces overwhelmed by a single, harsh light. Choosing the right light fixture isn't just about illuminating a room; it's about setting the mood, enhancing functionality, and even boosting your home's aesthetic appeal. 🏡
But with endless options out there, where do you even begin? Don't worry, we're here to shine a light on the process! 💡
1. Understand the "Why": What's the Purpose of the Light? 🤔
Before you fall in love with a gorgeous chandelier, stop and think: what do you need this light to do?
* Ambient (General) Lighting: This is your primary light source, providing overall illumination for the room. Think flush mounts, semi-flush mounts, or recessed lighting. For a living room in a historic Topeka home, a beautiful semi-flush mount can provide general light without overwhelming the space. 🛋️
* Task Lighting: Focused illumination for specific activities like reading, cooking, or working. Under-cabinet lighting in your kitchen, a desk lamp in your home office, or a pendant over an island are perfect examples. 🧑🍳
* Accent Lighting: Designed to highlight features, create visual interest, or add drama. Picture track lighting pointing at artwork, wall sconces framing a fireplace, or uplighting on a prized plant. 🖼️
* Decorative Lighting: Often serves more as a design element than a pure light source. While it still provides light, its primary role is aesthetic. Think of a stunning pendant in an entryway or an ornate chandelier in a dining room. ✨
Many rooms need a combination of these layers to be truly functional and inviting!
2. Size and Scale: Don't Get Overwhelmed (or Underwhelmed) 📏
This is where many homeowners make mistakes. A fixture that's too small will look lost, while one that's too large can dominate the space and feel claustrophobic.
For most rooms (non-dining areas):
A common rule of thumb for general room lighting is to add the room's length and width in feet, and that sum roughly equals the ideal diameter of the fixture in inches.
* Example: A 10 ft x 12 ft room = 22 inches. Look for a fixture around 20-24 inches in diameter.
For dining rooms (over a table):
The fixture should typically be about one-half to two-thirds the width of your dining table. This prevents head bumps and ensures the light is centered over the eating area. 🍽️
For hanging height (pendants, chandeliers):
* Over a dining table: The bottom of the fixture should be about 30-36 inches above the tabletop.
* In an open foyer or staircase: Ensure enough clearance for people to walk underneath – at least 7 feet from the floor to the bottom of the fixture. 🚶♀️
3. Style Harmony: Matching Your Topeka Home's Personality 🏡
Topeka homes boast a wonderful mix of architectural styles, from charming Victorians to mid-century ranches and modern new builds. Your light fixtures should complement your home's existing aesthetic.
* Traditional: Look for fixtures with classic lines, intricate details, materials like bronze, brass, or iron, and perhaps fabric shades.
* Modern/Contemporary: Clean lines, minimalist designs, chrome, brushed nickel, or matte black finishes, often with geometric shapes.
* Farmhouse/Rustic: Distressed finishes, wood accents, industrial elements, exposed bulbs, and simple shapes. 🌾
* Transitional: A blend of traditional and modern elements, offering versatility and timeless appeal. This is a safe and popular choice for many homes!
Don't be afraid to mix metals or styles subtly, but ensure there's an overarching theme that ties the room together.
4. Bulb Brilliance: Watts, Lumens, and Color Temperature 💡
It's not just the fixture, but the bulb inside that truly creates the light!
* Lumens, Not Watts: Forget watts (they measure energy consumption). Focus on lumens, which measure brightness. A standard 60W incandescent bulb produces about 800 lumens. Check the packaging for lumen output.
* Color Temperature (Kelvin - K): This determines the warmth or coolness of the light.
* 2700K - 3000K (Warm White): Soft, cozy, inviting light – great for living rooms, bedrooms, and dining areas. Mimics traditional incandescent light. 🔥
* 3500K - 4000K (Cool White/Neutral White): Brighter, more energetic light – good for kitchens, bathrooms, home offices, and utility rooms. 🧊
* 5000K - 6500K (Daylight): Very bright, blue-white light – often used for task lighting, workshops, or areas where true color rendering is crucial. ☀️
Pro-Tip: Dimmers are your best friend! They allow you to adjust the brightness and mood of a room, maximizing the versatility of your chosen fixture. 🔄
5. Practicality & Installation: When to Call Your Local Handyman 🛠️
Finally, consider the practical aspects:
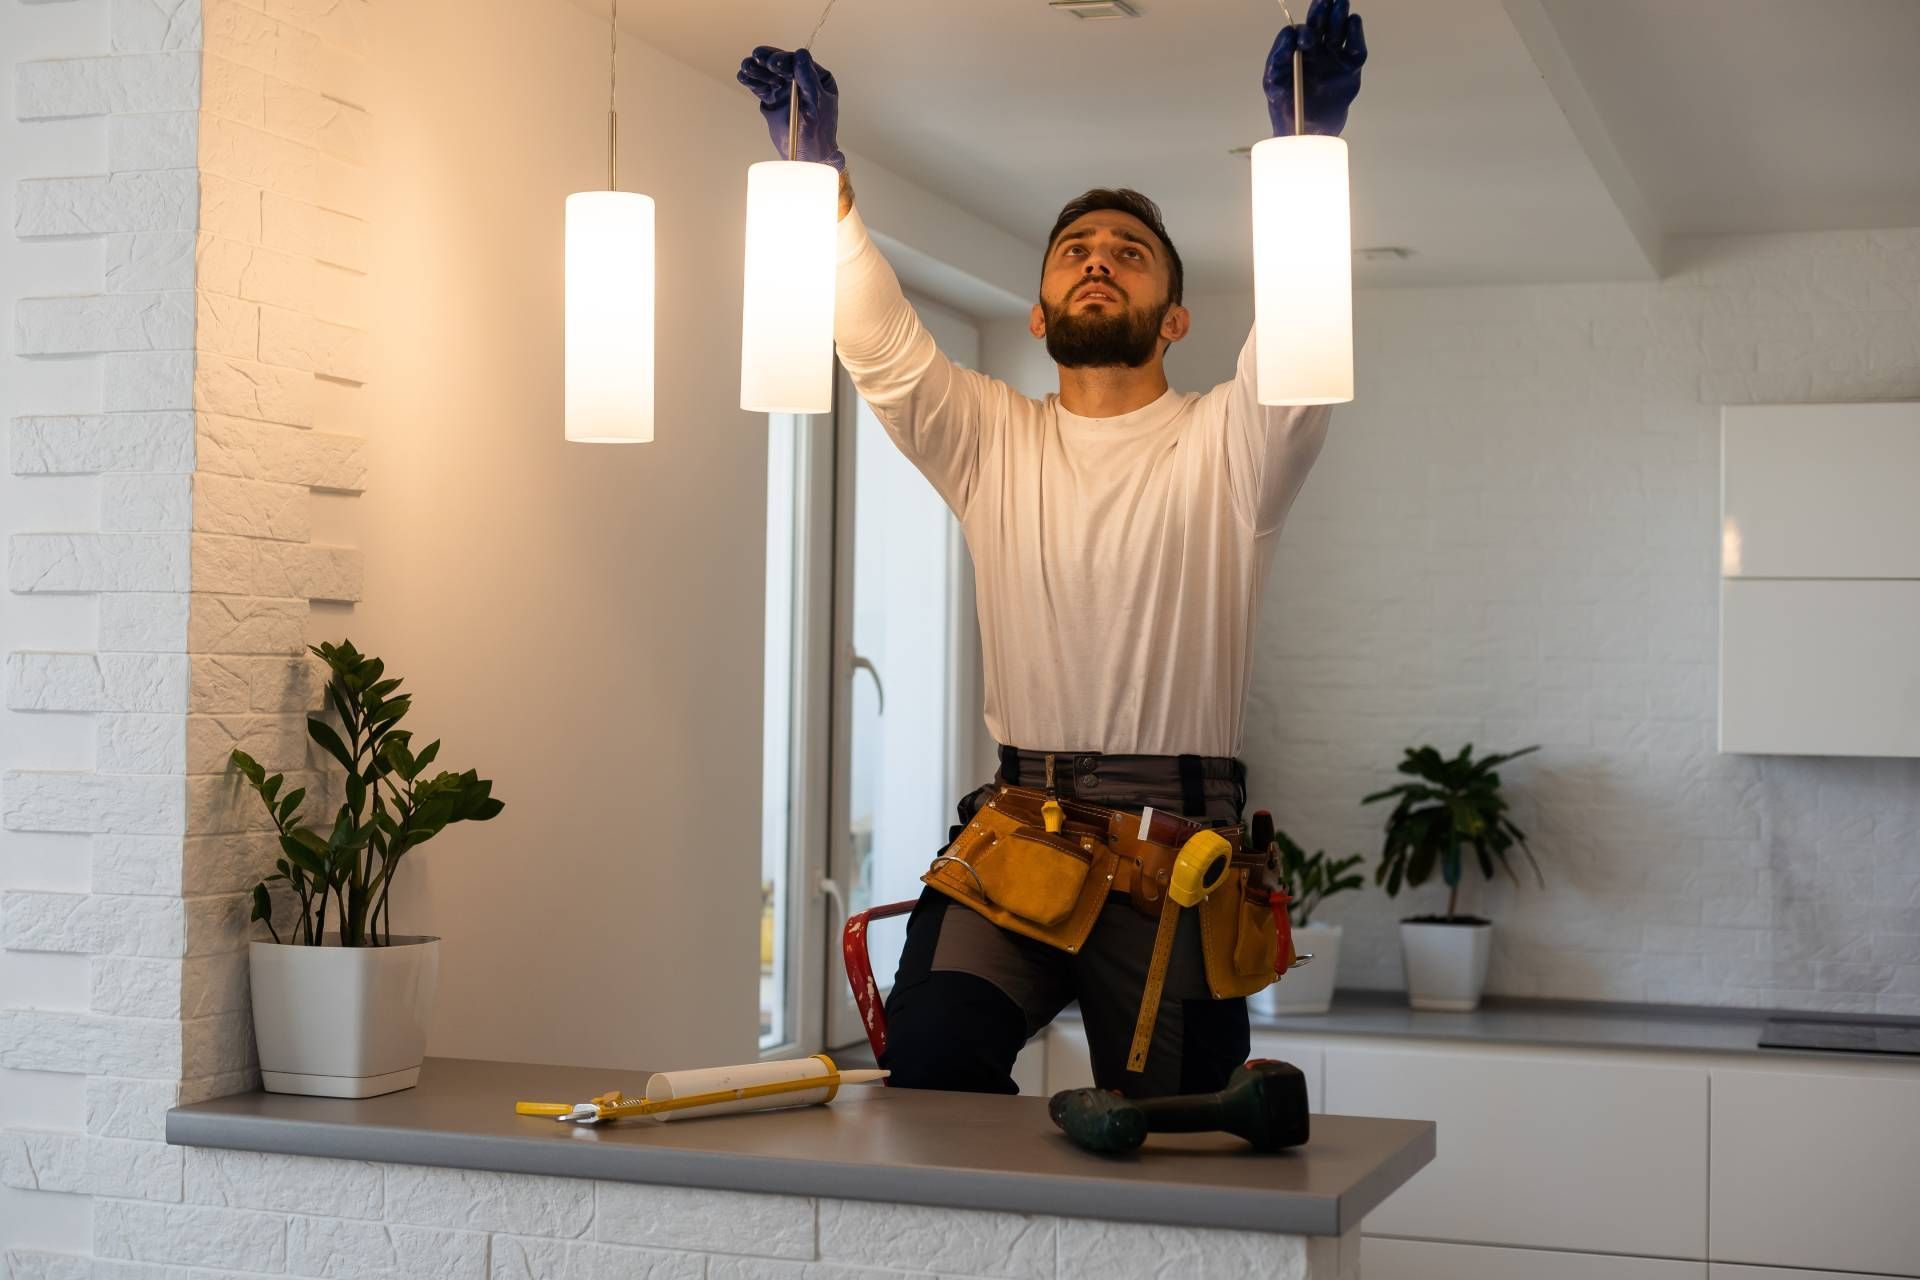
* Installation Difficulty: Some fixtures are simple swaps, while others require new wiring or bracing. If you're not comfortable working with electrical components, or if the fixture is heavy and requires special mounting, it's always best to call a professional. That's where your friendly Topeka handyman comes in! 👷
* Maintenance: How easy is it to change bulbs or clean the fixture?
* Energy Efficiency: LED fixtures and bulbs are incredibly energy-efficient, saving you money on your utility bills in the long run. 💰
Choosing the right light fixture can transform a room, making it more functional, comfortable, and beautiful. If you've found the perfect light but need a hand with the installation, or if you'd like a professional opinion on what would work best in your Topeka home, don't hesitate to give us a call! We're here to help you illuminate your space, one fixture at a time. 📞
Blessings!

There’s a special kind of satisfaction that comes from completing a project with your own two hands. The pride of a freshly painted room 🎨 or a newly assembled piece of furniture is unbeatable! ✨ But then there’s the other side of the coin: the sinking feeling when a simple repair turns into a costly mistake. 😩 So, how do you know when to roll up your sleeves 👕 and when to pick up the phone? 📞 The answer lies in honestly assessing the task, your skills, and the potential risks. As a construction and maintenance company, we believe a successful project is one done right, no matter who does it! 🙏 Here’s a simple framework to help you decide. 👇 The "Absolutely DIY" Zone ✅ These are the projects that are perfect for a weekend and come with a low risk of costly mistakes. If you have basic tools 🛠️ and a little patience, go for it! Painting a Room: A great way to transform a space and build confidence. 🖌️ Assembling Furniture: Most flat-pack furniture comes with clear instructions and requires only basic tools. 📦 Minor Landscaping: Planting flowers 🌷, mulching a garden bed, or a simple gutter cleaning are all safe bets. Swapping a Faucet: For a kitchen or bathroom sink, this is often a straightforward task, as long as you can turn off the water supply. 💧 The "Proceed with Caution" Zone ⚠️ These projects look simple but can quickly get complicated. A small mistake can lead to big problems, making the professional route a wise investment. 💰 Tiling a Small Area: It seems easy, but getting the layout right and making clean cuts requires specific tools and a lot of practice. 📐 Patching a Large Section of Drywall: While a small hole is easy to fix, a large section requires careful work to blend seamlessly. A sloppy job will be very noticeable. 🫣 Installing a New Toilet: A poor seal can lead to slow, hidden leaks that cause thousands of dollars in subfloor damage. 💧 Replacing a Ceiling Fan: This involves working with electrical wiring. ⚡ A mistake can lead to a fire hazard or a faulty fan. 🔥 The "Always Hire a Pro" Zone 🚨 Some projects are simply too dangerous or complex to attempt on your own. They require professional licenses, specialized tools, and insurance for a reason! 🚧 Anything Structural:Removing a wall, adding a load-bearing beam, or cutting into the foundation requires a pro. A misstep here can be catastrophic! 🏚️ Major Electrical Work: Installing a new circuit, moving an outlet, or replacing a breaker is NOT a DIY job. An electrician ensures the work is up to code, safe, and insured. ✅ Major Plumbing:Rerouting pipes, installing a new shower system, or repairing a significant leak requires expertise. A burst pipe can cause extensive water damage! 🌊 Roofing:This is a highly dangerous job that involves working at heights. A professional roofing company has the right safety equipment and knows how to install materials to prevent leaks and rot. 👷♂️ Making Your Final Decision 🤔 Before you start any project, ask yourself these questions: Safety: Do I have the right safety gear and knowledge to prevent injury? ⛑️ Cost: Is it cheaper to hire a pro than it would be to fix a mistake? 💸 Time: Do I have the time and patience to complete this correctly? ⏳ Tools: Do I have the specialized tools required for this job? 🧰 Ultimately, the goal is a successful project that adds value to your home. Whether you're a DIY enthusiast or prefer to leave it to the experts, we're here to help you get the job done right. 🏡 Ready to take on a project? Contact us for a professional consultation and a free estimate! 📧 Many blessings! ✨

Ever tried to drive a long screw into wood and felt your drill just wasn't cutting it? 😩 Or maybe you tried to drill into concrete and barely made a dent? 🧱 The problem isn't you, it's often the **wrong tool** for the job! 😱 Most people think of a "drill" as just one thing, but in our world of construction and maintenance, there are specialized drills for every task! Knowing which one to grab means the difference between a quick, successful job and a frustrating, time-consuming one. ⏱️ Here’s your ultimate guide to drill types and what they're best for! 👇 1. The Drill/Driver (The Workhorse 🐎) This is the most common power tool in any toolbox! It’s the OG drill everyone knows. How it Works: Spins super fast to drill holes in wood, plastic, or metal, and drives screws with adjustable power (torque) so you don't strip them. 💪 Best For: Everyday tasks! Think assembling furniture 🛋️, drilling pilot holes, driving screws, and general DIY projects. 🏡 Not For: Super long screws into tough wood, or drilling into rock-hard stuff like concrete. 🚫 2. The Impact Driver (The Powerhouse!💥) Looks like a compact drill, but this bad boy is built for serious power and speed! How it Works: It not only spins but also delivers rapid, powerful **"impacts"** as it turns. This high-torque, "hammering" action drives screws and bolts with incredible force! 🚀 Best For: Driving *long* screws into dense materials (like deck boards 🪵), tightening lag bolts, and other heavy-duty fastening. It stops screws from slipping! Not For: Drilling clean, precise holes. The high torque is too much for delicate work and can snap smaller bits. 🤏 3. The Hammer Drill (The Concrete Crusher! 🔨) If an impact driver is for tough screws, a hammer drill is for tough holes! How it Works: Has two modes: normal rotation AND a powerful, forward-and-back hammering motion. This chipping action, plus the spin, pulverizes concrete, brick, and stone! 🤯 Best For: Drilling holes into masonry, concrete walls, brick, or stone. Your go-to for mounting shelves on a brick wall or anchoring something into concrete. 🏗️ Not For: Wood, drywall, or metal. The hammering will just mess up softer materials and can be dangerous! 🚧 4. The Right-Angle Drill (The Contortionist! 🧘) When you need to drill or drive a screw in a super-tight spot where a normal drill won't fit, this drill saves the day! How it Works: The chuck (where the bit goes) is at a 90-degree angle to the drill body. This lets it squeeze into awkward, cramped spaces. Best For: Plumbing and electrical work! 🔌💧 Drilling holes through joists in attics, between studs, or inside cabinets. Perfect for running wires or pipes where space is limited. Not For: Open-area jobs. It’s a specialty tool for those tricky situations! 🤔 Corded vs. Cordless: Power 💪 vs. Portability 🎒 Once you've picked the *type* of drill, there's another big choice: plug it in or go wireless? It’s a classic trade-off! Cordless Drills (Freedom! 🕊️) Most modern drills are cordless, thanks to amazing lithium-ion batteries. Pros: HUGE advantage in portability! Take it anywhere—up a ladder 🪜, in an attic, or across the yard—no hunting for outlets or tripping on cords! ✨ Cons: Limited by battery life. 🔋 For really long, continuous jobs, you'll need extra batteries or a charger handy. The battery also adds some weight. 💪 Corded Drills (Uninterrupted Power!⚡) These drills plug directly into a power outlet for a constant flow of juice! Pros: Consistent, unlimited power! Ideal for high-demand tasks like mixing cement 搅拌 or drilling hundreds of holes non-stop. Often lighter since there's no heavy battery. lighter! Cons: You're tethered to an outlet, which can be annoying and a trip hazard. Not great for quick jobs or places without power. 🔌 In a Nutshell 🧐 Drill Type | Best Use | Key Feature | | Drill/Driver | All-purpose drilling & driving screws 🔩 | Versatile & user-friendly | | Impact Driver | Driving long screws & bolts with force 🔨 | High torque with powerful impacts | | Hammer Drill | Drilling into concrete, brick, & stone 🧱 | Forward hammering motion for masonry | | Right-Angle Drill | Drilling in tight, awkward spaces 🤏 | 90-degree chuck for confined areas | | Cordless | Anywhere, anytime! 🏞️ | Ultimate portability (battery-powered) | | Corded | Heavy-duty, continuous power! ⚡ | Consistent power (plugged in) | Choosing the right tool is key to working smarter, not harder! Next time you tackle a project, think about your material and task. If it seems too tough, or you're just not sure, give us a call! We're always here to help you nail it! 🎯 Blessings!

Finding a crack in your drywall can be super stressful! 😩 But don't panic! Most of the time, it’s no big deal. ✨ As a maintenance and repair company, we've seen it all, and we're here to help you figure out if you've got a minor cosmetic issue or something more serious. 🛠️ Here’s your guide to understanding those cracks, what they mean, and when it’s time to repair them. 🏡 Why Do Cracks Happen? 🤷♀️ Cracks are a symptom, not the problem itself. Here’s what's usually going on: House Settling: This is the most common reason! 🏘️ Your home is always adjusting to temperature changes, humidity, and the ground underneath it. This can cause tiny, hairline cracks near windows and doors. Bad Installation: Sometimes, if the drywall wasn't taped and mudded correctly, cracks can show up later as the joints fail. 😥 Water Damage: Watch out for this one! 🚨 A leak from your roof or a pipe can soak the drywall, making it swell and then crack when it dries. If you see a water stain, that's a huge clue! 💧 Foundation Movement: This is the big one. ⚠️ Large, spreading cracks that get bigger over time can be a sign of a foundation problem. They often run diagonally from corners. When to Repair a Drywall Crack You've got a crack, now what? Here’s our advice based on the size of the crack. 👀 The Tiny, Hairline Crack (< 1/8 inch wide) - DIY Time! 👩🔧 What it looks like: A thin, almost invisible line, usually around windows and doors. What it means: It's almost always just your house settling. No biggie! Should you fix it? Yes! These are easy to repair yourself with some joint compound and a fresh coat of paint. It just makes your home look better! 😊 The Noticeable Crack (1/8 to 1/4 inch wide) - Maybe Call a Pro! 🧑🔧 What it looks like: A more obvious crack, often along a seam. What it means: This could be a poorly installed joint or a spot with a little more settling. Should you fix it? You could try, but a pro will be able to properly re-tape and mud the joint to make sure the crack doesn't come right back. 🤝 The Big, Scary Crack (> 1/4 inch wide) - CALL US NOW! 😱 What it looks like: A wide, deep crack, often diagonal or spider-web-like. It might be in a corner or on the ceiling. What it means: This could be a sign of a major structural or foundation issue. Should you fix it? DO NOT REPAIR IT YOURSELF! 🚫 Covering a large crack is like putting a bandage on a broken arm. It'll just reappear, and you’ll be hiding a more serious problem. You need a professional to find the root cause. 🕵️ Why You Shouldn't Ignore a Big Crack Ignoring a serious crack is a risky move! 😬 Home Value: Cracks are not a good look. 👎 Repairing them makes your home look sharp and well-maintained. Preventative Care: A small crack might be a warning sign. By getting it checked out, you could stop a bigger, way more expensive problem from happening later. 💰 Foundation Protection: If the crack is from foundation movement, your home is literally telling you something's wrong. 🗣️ Ignoring it can lead to warped floors, sticking doors, and a massive repair bill down the road. 💸 When in doubt, it's always best to be safe! If you have a wide, growing crack or you're just not sure, give us a call. We'll check it out and give you an honest recommendation so you can have peace of mind. Blessinga.🙏

Hey, Topeka friends! 👋 Have you ever stopped to think about what's flowing through your home's air vents? It’s not just conditioned air—it can also be a mix of dust, pet dander, pollen, and other microscopic particles. Over time, these can build up inside your ductwork, turning your home's air system into a hidden dust bunny factory. Yikes! 🤧 This is why air vent cleaning is so much more than a simple chore; it's a vital part of maintaining a healthy and efficient home. The Big Benefits of Clean Air Vents Getting your air vents professionally cleaned has a direct impact on your comfort, health, and even your wallet. Here’s what you stand to gain: Better Air Quality: This is the most obvious benefit. When dust and allergens are removed from your vents, you're left with cleaner, fresher air to breathe. This is especially important for anyone in your household who suffers from allergies, asthma, or other respiratory issues. 🌬️ Improved HVAC Efficiency: Your heating and cooling system has to work harder to push air through ducts clogged with debris. When those blockages are gone, your system can operate more efficiently, which means it uses less energy. 💰 Lower Energy Bills: Less work for your HVAC system translates directly to lower energy consumption. A professional cleaning can lead to a noticeable drop in your monthly utility bills, saving you money in the long run. 💸 Preventing Future Breakdowns: By removing buildup that can put a strain on your system's motor and other components, you’re helping to prevent costly breakdowns and extend the overall lifespan of your HVAC unit. When to Clean: The Best Time is Between Seasons! So, when's the ideal time to schedule this important task? 🤔 We always recommend getting your vents cleaned between seasons! 🍂➡️ Winter or 🌸➡️ Summer transitions are perfect because your HVAC system isn't running constantly. This downtime makes it a convenient and effective time for our team to get in and give your system a thorough cleaning. Beyond the seasonal timing, there are other signs that it might be time to call a professional: You've just moved into a new home. You've completed a major home renovation project. You notice an unusual, musty odor coming from your vents. The air in your home seems unusually dusty, even after you've cleaned. How Often Should You Schedule a Cleaning? As a general rule, we recommend having your air vents professionally cleaned at least every other year. However, certain factors may require more frequent attention. For example, if you have multiple pets 🐾, a household with smokers, or family members with severe allergies 🤧, you might consider a yearly cleaning to keep your indoor air as clean as possible. Don't let your air vents become a hidden source of dust and discomfort. Take a deep breath of fresh air and consider scheduling your cleaning soon! 👍 Blessings!

You hear it sometimes, a rhythmic drip... drip... drip from your kitchen or bathroom faucet. Maybe you've gotten used to it, or you tell yourself you'll get around to fixing it "someday." But at GrayBeard Construction & Maintenance, we want to warn you: that seemingly innocent leaky faucet is a silent destroyer, quietly costing you money and potentially leading to significant damage. 😬 It's easy to underestimate the impact of a small drip, but the reality is far more concerning. Let's break down why you can't afford to ignore it. 👇 The Hidden Costs of a "Small" Leak 💸 Skyrocketing Water Bills: 📈 Even a slow drip can waste hundreds, even thousands, of gallons of water per year. According to the EPA, a faucet dripping once per second can waste over 3,000 gallons per year – enough to take more than 180 showers! 🚿 That wasted water doesn't disappear; it shows up directly on your utility bill, adding up to surprising amounts over time. You're literally pouring money down the drain! 💸🚽 Water Damage & Mold Growth: 🌊🦠 This is often the most destructive hidden cost. A constant drip, whether it's under your sink, behind a wall, or even just on your countertop, creates a persistent damp environment. Under Sinks: This can lead to warped cabinets, damaged flooring, and mildew growth. 🏚️ Walls & Ceilings: If the leak is in a pipe behind a wall or above a ceiling, it can cause structural damage, rot wood, and compromise drywall integrity. ⚠️ Mold & Mildew: Damp conditions are a breeding ground for mold and mildew. Not only is this unsightly and difficult to remove, but certain types of mold can also pose serious health risks, triggering allergies, respiratory issues, and other problems. Remediation can be costly and disruptive. 😷 Decreased Appliance Lifespan & Fixture Wear: 🛠️📉 Beyond the water itself, the minerals in your water can cause unsightly stains on sinks, tubs, and toilets. Over time, these mineral deposits can also build up in pipes and on faucet components, leading to further corrosion and potentially shortening the lifespan of your fixtures and connected appliances. 🕰️ Simple Diagnostics: Is Your Faucet Leaking? 🤔🔍 Sometimes the drip is obvious, but other times it's more subtle. Here's how to check: Listen: 👂 In a quiet room, can you hear a consistent drip? Look: 👀 Check around the base of the faucet, under the sink in the cabinet, and even the pipes leading into the wall for any signs of moisture, discoloration, or pooling water. The Paper Towel Test: 🧻 Place a dry paper towel under the faucet or around the pipes. Check it after a few hours or overnight for any dampness. When to Call GrayBeard: Your Trusted Partner in Plumbing Repair 👷♂️🔧 While a simple washer replacement might seem like a quick DIY fix, many leaks are more complex, involving worn-out cartridges, O-rings, or even pressure issues within your plumbing system. Attempting a repair without the right tools or expertise can often lead to greater problems and more expensive repairs down the line. 😫 At GrayBeard Construction & Maintenance, we're here to help. We understand that your home and office should be places of refuge, and a persistent leak certainly disrupts that comfort. Our experienced team can: Quickly diagnose the source of the leak, whether it's a simple fix or a more complex plumbing issue. 💡 Provide efficient and lasting repairs, ensuring your faucet is properly sealed and your plumbing system is sound. ✅ Inspect for any hidden water damage or mold, and recommend appropriate remediation if necessary. 🏡✨ Don't let a "silent destroyer" drain your wallet or damage your property. If you suspect a leaky faucet or any other plumbing issue, don't hesitate. Contact GrayBeard Construction & Maintenance today for a reliable and lasting solution! 📞 We're here to restore your comfort and peace of mind. 😊 Blessings!

At GrayBeard Construction & Maintenance, we've seen countless homes get ready for the market, and we've put together our top tips to help you shine! ✨ Selling a home isn't just about listing it; it's about presenting your property in the best possible light. Think of it as preparing your home for its big audition! Here are some key areas to focus on before that "For Sale" sign goes up: 1. Declutter & Depersonalize! 📦 This is HUGE! Buyers need to envision themselves living in your space, and too much "you" makes that hard. Toss, Donate, or Store: Go through every room with a critical eye. Do you really need that collection of porcelain cats? 🤔 Get rid of anything you don't use or love. Clear the Counters: Kitchen and bathroom counters should be as clear as possible. Less clutter makes spaces feel bigger and cleaner. 🧼 Family Photos & Memorabilia: Pack away most personal photos, awards, and unique decor. You want the home to feel like a blank canvas. 🖼️➡️ blank slate Closet & Cabinet Space: Buyers will open closets and cabinets. Make sure they're not overflowing! This shows ample storage. 💪 2. Deep Clean Everything! 🫧 Seriously, everything. A spotless home signals to buyers that the home has been well-maintained. Floors & Carpets: Get carpets professionally cleaned. Mop and shine hard floors. ✨ Kitchen & Bathrooms: These are prime areas. Scrub grout, shine fixtures, clean inside and outside of appliances. No one wants to see yesterday's dinner in the oven! 🤢➡️🤩 Windows & Mirrors: Let that natural light flood in! Clean windows inside and out. ☀️ Dust, Dust, Dust: Don't forget ceiling fans, light fixtures, baseboards, and blinds. 🌬️ Eliminate Odors: Pet odors 🐶, cooking smells 🍲, or mustiness can be a major turn-off. Open windows, use air fresheners sparingly, and find the source of any persistent smells. 3. Tackle Minor Repairs (The "Honey-Do" List! 🛠️) Those little things you've been putting off? Now's the time! Buyers will notice. Leaky Faucets: Drip, drip, drip = potential problem to a buyer. Fix 'em! 💧 Loose Doorknobs/Handles: Easy fix, big impact on perceived quality. 🚪 Patch & Paint: Small holes in walls, scuffs, or outdated colors? A fresh coat of neutral paint is one of the best ROI (Return On Investment) projects. Think grays, beiges, and whites. 🎨 Cracked Tiles/Grout: Quick fixes can make bathrooms and kitchens look much newer. 🧽 Running Toilets: Annoying to you, alarming to a buyer. 🚽 Faulty Light Fixtures/Switches: Make sure all lights work and have matching bulbs. 💡 Squeaky Doors/Floors: A little lubricant can go a long way. 🤫 4. Boost Your Curb Appeal! 🌱 First impressions are everything! What do buyers see when they pull up? Lawn Care: Mow, trim, and edge the lawn. Weed flower beds. 🌳 Power Wash: Siding, walkways, and driveways can get surprisingly dirty. A good power wash makes a huge difference. 🚿 Front Door Freshness: A freshly painted front door (a welcoming color!) and shiny hardware can be incredibly inviting. 🚪✨ Flowers & Planters: Add some colorful flowers near the entrance or in window boxes. 🌸🌼 Clear Walkways: Make sure paths are clear and welcoming. Exterior Lights: Ensure all outdoor lighting is working and clean. 💡 5. Stage for Success (Even Minimally) 🛋️ If professional staging isn't in your budget, you can still do a lot yourself! Furniture Arrangement: Arrange furniture to make rooms feel spacious and highlight their purpose. Pull furniture away from walls slightly. Lighting: Open blinds and curtains during showings. Turn on all lights to make rooms feel bright and inviting. ☀️ Fresh Linens: Crisp, clean towels in bathrooms, new shower curtains. Subtle Scents: A clean smell is best, but a diffuser with a light, pleasant scent (like citrus 🍋 or vanilla) can be nice. Avoid strong, overpowering smells. Set the Table: For a dining room, a simple centerpiece can add warmth. 🍽️ Preparing your home for sale can feel like a lot of work, but remember: every bit of effort you put in now can translate to a faster sale and a better offer. If you're feeling overwhelmed by that "to-do" list of repairs and improvements, remember the GrayBeard Family is just a call away! We specialize in getting homes market-ready, from patching holes to power washing. 📞 Let us help you make your home shine! ✨ Good luck with your sale! We're rooting for you! 🎉 Blessings!

💸 A running toilet, even a tiny trickle, can gush hundreds, even *thousands*, of gallons of water every month, sending your water bills through the roof! 📈 But here's the good news: the culprits are usually easy fixes: the **fill valve** and the **flapper**. Let's dive in and stop that money drain! 💰➡️🚽 --- The Silent Water Thief: Why Your Toilet is Running 🤫💧 When your toilet keeps running, it means water is constantly flowing from the tank into the bowl, even without flushing. This usually points to one of two main issues: * **A faulty flapper: 😈** This is the most common troublemaker! The flapper is the rubber or plastic seal at the bottom of the tank. It lifts to let water into the bowl when you flush and then drops back down to create a watertight seal. If it's worn out, it can't seal properly! 😬 * **A malfunctioning fill valve: ⚙️** The fill valve is like the tank's water guardian. It refills the tank after each flush and then shuts off the water flow when the tank is full. If it's not shutting off correctly, water will keep flowing, often trickling down the overflow tube. 🤦♀️ --- How Long Do These Vital Parts Last? ⏳ Knowing the lifespan of these toilet heroes (or villains!) can help you know when it's time for a replacement. ### The Flapper: Your 3-5 Year Hero (or Villain!) 💪👎 Your toilet flapper is usually made of rubber or a flexible synthetic material. It's super important, but also the most vulnerable! You can generally expect a flapper to last between **3 and 5 years**. 🗓️ **Why do flappers fail?** 😫 * **Material Degradation:** Constant swimming in water, exposure to minerals (especially in hard water 🪨), and harsh chemicals in municipal water (like chloramines 🧪) can make the rubber stiff, brittle, or cracked. 💔 * **In-Tank Cleaners:** Those convenient drop-in bleach tablets? **A flapper's worst nightmare!** 😱 They drastically speed up the rubber's deterioration, often cutting your flapper's life in half or even more! ✂️ * **Wear and Tear:** Every single flush means the flapper lifts and reseals, leading to gradual mechanical wear. 🏋️♂️ The Fill Valve: A Longer-Lasting Workhorse (Usually 4-10 Years) 👷♂️✨ The fill valve is a sturdier assembly, built to last longer than the flapper. You can typically expect a fill valve to last anywhere from **4 to 10 years**. 🕰️ **Why do fill valves fail?** 🤔 * **Mineral Buildup:** Hard water can cause mineral deposits to gunk up inside the valve, preventing it from shutting off properly. 🧱 * **Component Wear:** Internal plastic or rubber parts can simply wear out over time, leading to leaks or improper shut-off. 😫 * **Manufacturing Defects:** Less common, but a poorly made valve can fail prematurely. 🏭 --- Why You MUST Fix a Running Toilet (Beyond the Annoyance) 🚫💸 The main reason is simple: **WATER WASTE!** 🌊💸 A continuously running toilet can waste: * **Hundreds of gallons per day!** 🤯 Even a slow leak can add up to **200 gallons a day**. That's like flushing money down the drain! 💸 * **Thousands of gallons per month!** 😱 You're literally paying for water that goes straight into the sewer! 🤮 * **Significant increases on your water bill!** 💰 What seems like a minor drip can easily add **$20-$100 or more** to your monthly water bill, depending on local water rates. Over a year, that's a **HUGE chunk of change!** 🤯 Beyond the financial hit, fixing a running toilet conserves a precious resource 🌍 and shrinks your environmental footprint! 🌱 --- DIY Repair: How to Change Your Fill Valve and Flapper 🛠️🚽 You don't need to be a plumbing wizard 🧙♂️ to tackle these common repairs. With a few basic tools and some patience, you can get your toilet back in tip-top shape, save water, and keep more cash in your pocket! 🤑 **Before You Start (SUPER IMPORTANT!):** 🚨 * **Turn off the water supply:** Locate the shut-off valve on the wall behind or near the base of the toilet. Turn it **clockwise** until the water stops. ➡️🛑💧 * **Flush the toilet:** Hold the handle down to drain as much water as possible from the tank. ⬇️💦 * **Sop up excess water:** Use a sponge or towel to remove any remaining water from the tank. sponges🧽 Part 1: Replacing the Flapper (The Easier Fix) 🤸♀️ **Tools Needed:** * New flapper (make sure it's the right type/size for your toilet – bring your old one to the store! 🛒) * Sponge/towel 🧽 **Steps:** 1. **Disconnect the old flapper:** * Unclip the chain from the flush lever arm.⛓️ * Carefully unhook the flapper's "ears" or "posts" from the pegs on the overflow tube (this varies slightly by flapper type). Some flappers slide off a pipe.👂 2. **Install the new flapper:** * Attach the new flapper's ears/posts to the pegs on the overflow tube, ensuring it sits flat and forms a good seal over the drain hole. ✅ * Connect the flapper chain to the flush lever arm. Leave a little slack (about 1/2 to 1 inch) in the chain so it doesn't get caught, but not so much that the flapper doesn't lift completely.🤏 3. **Test:** Turn the water supply back on. Let the tank fill, then flush a few times to ensure the flapper seals properly and the toilet stops running. 👍 Part 2: Replacing the Fill Valve (A Bit More Involved, but Doable!) 👷♂️💪 **Tools Needed:** * New fill valve (universal models are widely available 🌐) * Adjustable wrench or channel locks 🔧 * Bucket 🪣 * Sponge/towel 🧽 **Steps:** 1. **Disconnect water supply and drain tank** (as described in the "Before You Start" section). 🛑💦 2. **Disconnect the supply line:** Place a bucket under the toilet's fill valve connection. Using your wrench, carefully loosen the nut connecting the water supply line to the underside of the fill valve. Be prepared for a small amount of water to drain out. 💧➡️🪣 3. **Remove the old fill valve:** * Inside the tank, unscrew the large nut at the base of the fill valve (where it connects to the tank). 🔩 * Lift the old fill valve straight out of the tank. ⬆️ 4. **Install the new fill valve:** * Insert the new fill valve into the hole at the bottom of the tank. * From the underside of the tank, thread the large mounting nut onto the fill valve and tighten it securely by hand, then snug it with your wrench (don't overtighten!). 🤝🔧 * Adjust the height of the fill valve according to the manufacturer's instructions. The critical part is that the top of the overflow tube (part of the flush valve) should be at least 1 inch below the critical level mark (CL) on the fill valve, or 1 inch below the fill valve's water level adjustment screw. This prevents siphoning of tank water into your fresh water supply.📏 * Attach the refill tube (small hose) from the fill valve to the overflow tube. hose 5. **Reconnect the supply line:** Carefully reattach the water supply line to the new fill valve, tightening the nut with your wrench. 🔧 6. **Test:** Slowly turn the water supply back on. Allow the tank to fill. Check for any leaks at the connections. Flush the toilet several times to ensure the new fill valve fills the tank to the proper level and shuts off completely. You may need to fine-tune the height adjustment. ✅ --- Don't let a running toilet silently drain your resources! 💸 By understanding how long these parts last and knowing how to replace them, you're empowered to tackle this common household issue, save water, and keep more money in your pocket! 💰🥳 What's the next DIY project on your list? Tell me below! 👇 Blessings!

🛁 Your bathroom should be a peaceful retreat, not a source of stress! If it's feeling more "blah" than "spa," it might be time for an upgrade. Here are 5 clear signs your bathroom is begging for a renovation: 1. Outdated Fixtures & Finishes 🕰️ Still rocking that avocado green toilet or seashell sink from decades ago? 🤢 It’s time for a refresh! Modern fixtures aren't just prettier; they're more efficient and easier to keep clean. ✨ Upgrade idea: Swap out those old faucets and lights for sleek, water-saving models with bright LED lighting! 2. Persistent Plumbing Problems 💧 Drip, drip, drip... 😩 Leaky faucets, low water pressure, or toilets that won't stop running are more than just annoying. They can signal bigger, hidden plumbing issues. A renovation lets you fix these problems before they become major headaches (and costly repairs!). 🔧 Pro tip: When we renovate, we can inspect and upgrade your plumbing to prevent future worries! 3. Lack of Storage or Functionality 🧺 Is your counter buried under toiletries? 🤯 Do you constantly fight for space? Your bathroom should work for you! If it's a cluttered mess, a renovation can help you redesign the layout and add clever storage solutions. 💡 Smart fix: Think built-in shelving, a stylish double vanity, or a hidden recessed medicine cabinet! 4. Visible Damage or Mold 🤢 Cracked tiles, peeling paint, or even worse... mold! 🦠 These aren't just ugly; they can impact your health and home value. A renovation lets you repair damage properly and boost ventilation to keep future problems at bay. ⚕️ Health check: During every remodel, we always check behind the walls for any hidden moisture or mold! 5. You're Just Not Happy With It! 😔 Sometimes, the biggest sign is simply how you feel. If your bathroom doesn't make you feel relaxed or proud, it's totally okay to want a change. A renovation can turn it into a space you genuinely love. ❤️ 🎨 Design tip: Even small changes like new tile, a fresh coat of paint, or updated lighting can make a HUGE impact! Ready for a Fresh Start? ✨ If any of these signs hit home, it's time to give your bathroom the glow-up it deserves! Contact us today for a free consultation—we'd love to help bring your vision to life! Graybeard Construction & Maintenance Experience is in the name 📞 785-554-9919 💻 www.callgraybeard.com

Got a never-ending to-do list? 😩 Hiring a handyman can feel like a superhero swooping in! 💪 But what's the deal with that hourly rate? 🤔 At GrayBeard Construction & Maintenance in Topeka, Kansas, we're all about being upfront! 🤝 Let's break down what makes up our pricing, so you know the awesome value you're getting! ✨ It's way more than just someone rocking up with a toolbox! 🧰 Here's the lowdown on what goes into our handyman hourly rate: 1. Skill and Expertise: Brains & Brawn! 🧠💪 Think of it like doctors! 🩺 You wouldn't ask a general doctor for heart surgery, right? 😉 Our experienced handymen bring serious knowledge and honed skills to tackle tons of tasks, from fixing leaky pipes 💧 to wiring lights 💡 and building decks 🔨. Years of Training & Practice: Our crew has put in the time to learn the ropes, master techniques, and stay current with the best ways to do things. 📚 This means they can spot problems fast 🔍, work efficiently 💨, and get it right the first time! ✅ Problem-Solving Ninjas: Handyman jobs aren't always simple! 🧩 Our experienced team can figure out tricky issues, find smart solutions, and roll with the punches 💪, saving you stress and maybe even more cash later! 💸 Specialized Superpowers: Need drywall fixed? 🩹 Painting done? 🎨 A new faucet installed? 🚿 We've got specialists for that! Their focused skills mean a top-notch finish. ✨ 2. Experience & Efficiency: Getting it Done Right, Faster! ⏱️💨 Time is money for everyone! ⏰ Experienced handymen are usually quicker and more efficient than someone just starting out. Speedy Completion: They've seen it all before! Their know-how means they can often finish tasks faster and more accurately. 🎯 Top-Notch Tools & Gear: We invest in quality tools 🛠️ and equipment ⚙️ that help our team work safely and efficiently. This investment is part of our costs. Avoiding Oopsies! 🤦♀️➡️✅: Experience cuts down on mistakes that could lead to more repairs or wasted materials. That saves you money in the long run! 💰 3. Insurance & Licensing: Your Safety Net! 🛡️📄 This is super important and protects YOU and US! Hiring an insured and (where needed) licensed handyman gives you major peace of mind.😌 Liability Shield: This protects you if we accidentally damage your property while working. Without it, you could be on the hook! 😬 Worker's Comp Coverage: This covers our team if they get hurt on your property. Hiring someone without it could make you responsible for their medical bills. 🤕 Licensed Pros (where required): Depending on the job and local rules in Topeka, some work needs specific licenses. Hiring licensed folks means we follow the rules and are serious about our work. 👍 4. Travel & Transportation: Getting to You! 🚗💨 Getting our awesome team and their tools to your place costs a bit, and that's part of our pricing. Fuel & Vehicle TLC: Our tucks need fuel ⛽, maintenance 🛠️, and insurance 🛡️. Travel Time: The time we spend driving to and from your home is part of the service. 🗺️ Material & Equipment Hauling: For bigger projects, we might need to bring specific materials and equipment. 🚚 5. Business Overhead: Keeping the Wheels Turning! ⚙️🏢 Running a professional maintenance and construction biz has costs that help us give you great service. Admin Heroes: This covers scheduling 🗓️, awesome customer service 😊, invoices 🧾, and all the behind-the-scenes stuff. Getting the Word Out! 📢: Letting folks know about our amazing services costs a bit. Keeping Our Skills Sharp! 🧠📚: We invest in training to keep our team up-to-date on the latest and safest ways to do things. Tech Magic! 💻📱: Using cool software for scheduling and talking to you helps us do our job better. The Awesome Value You Get! ✨ When you choose GrayBeard Construction, you're not just paying for an hour. You're investing in: Reliable Pros: We show up on time and ready to rock! ⏰ Quality Work: Our experienced team takes pride in doing a stellar job. 💪 Peace of Mind: Knowing insured and skilled folks are handling things. 😊 Time Saver Extraordinaire: We get things done efficiently, so you don't have to! ⏳➡️✅ Long-Term Fixes: We aim for lasting solutions, not just quick patches. 👍 We get that price matters! 💰 But think about the value and peace of mind you get with a trusted and professional handyman service like us in Topeka and KC Metro. We promise clear pricing and top-notch service you can count on! 🙌 Ready to ditch that to-do list? 👋 Contact us today for a free estimate and see the magic of quality handyman service! ✨📞 Blessings!

✨ Here's a post about hanging mirrors: Ready to reflect some style into your space? 🤩 Hanging mirrors can instantly brighten a room, create the illusion of more space, and add a touch of glam! Here are a few tips to make sure your mirror hangs securely and looks amazing: 📐 Plan it Out: Before you even think about nails, decide where you want your mirror to go. Consider the height, what it will reflect, and the overall balance of the room. Use painter's tape to visualize the placement – it's a game-changer! 💪 Know Your Walls: Are they drywall, plaster, or something else? This will determine the type of hardware you need. For heavier mirrors, you might need to locate studs for extra support. A stud finder is your new best friend! <0xF0><0x9F><0xAA><0x9A> 🛠️ Gather Your Supplies: You'll likely need: * Your gorgeous mirror! 🪞 * Measuring tape 📏 * Pencil ✏️ * Level (essential for straight hanging!) ↔️ * Screws or nails (appropriate for your wall type and mirror weight) 🔩 * D-rings, wire, or other hanging hardware (usually comes with the mirror) * Drill (if needed for pilot holes or anchors) 🪛 📌 Mark Your Spot: Once you've decided on the placement, use your measuring tape and pencil to mark exactly where the top center of the mirror will be. Use your level to ensure the mark is straight. 🔨 Install Hardware: If you're using screws and D-rings or wire, pre-drill pilot holes if necessary (especially for harder walls). Install your screws or picture hooks, leaving enough of the head exposed to hang the mirror securely. For heavy mirrors without wire, consider using heavy-duty picture hangers or anchors. 🖼️ Hang with Care: Carefully lift your mirror and hang it onto the installed hardware. Double-check with your level to make sure it's perfectly straight. Adjust as needed. ✨ Step Back and Admire! You did it! Now enjoy the beautiful reflection and the added dimension your mirror brings to your space. 🎉 Got any mirror hanging tips of your own? Share them in the comments below! 👇 Blessings!